Archive | Recipe of the day RSS feed for this section

Fried cod loin ( Skrei the Norwegian cod ) with white bean purée and garlic crisps

15 Feb

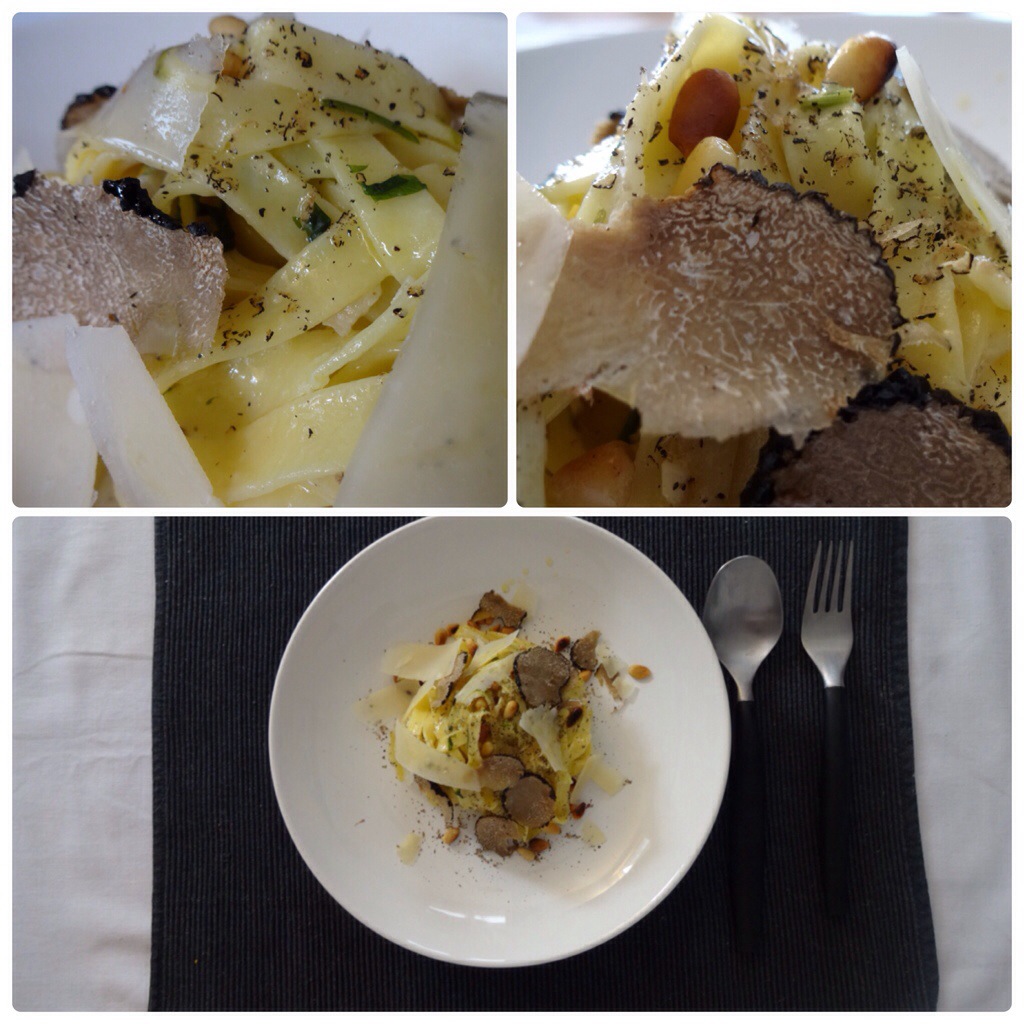
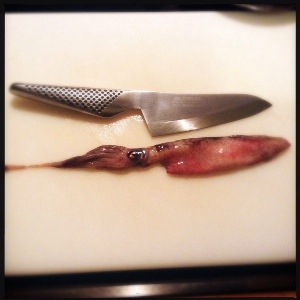
Fried cod loin ( skrei the Norwegian cod ) with white bean purée and garlic crispsimage
Skrei is the name for adult winter cod from the Barents Sea northwest of Norway where it migrates to spawn. This sustainable fish It is a delicacy which is looked forward too at the beginning of the year The cod travels from December to April from the Barents Sea to the warmer waters around Lofoten in the north of Norway to spawn . The migration ensures for a lean, tender and flaky fish.image

image
Skrei is therefore a Norwegian cod in the prime of its life, in fact, the word Skrei comes from the Norse word “skrida” which means to wander or walk.
Skrie’s premium quality is preserved through strict grading guidelines on size, maturity, location and appearance. It’s then packaged within 12 hours of being caught, and branded with the SKREI® logo to guarantee you’re getting the best sustainable product.

A real Norwegian fish supper is the marvellous mølje, a traditional trio of poached skrei, cod’s roe and cod’s liver, cooked up with onions in its own oil. Served simply with boiled potatoes and crispbread, the hearty family meal is often washed down with a shot or two of aquavit (a Scandinavian spirit distilled from potatoes) and followed by a little nap💤image
Fried cod loin ( Skreithe Norwegian cod ) with white bean purée and garlic crispsThe recipe is taken from the fantastic chef Daniel Galmiche who was on the BBC’s Saturday kitchen dated 07-02-2015.
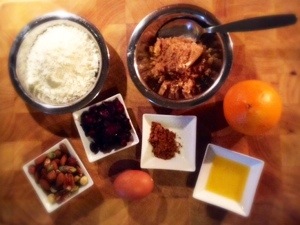
Ingredients
image
For the white bean purée
150g/5½oz dried butter beans , soaked overnight, drained and rinsed.
1 carrot, peeled, cut into quarters
1 shallot, cut into quarters
1 garlic clove, crushed
2 tbsp extra virgin olive oil
1 tbsp chopped flat leaf parsley
1 lime, zest and juice
For the garlic crisps
Sunflower oil for frying
100ml/3½fl oz full-fat milk
4 large garlic cloves, thinly sliced
3 tbsp plain flour
Sea salt and ground pepper
For the cod
8 garlic cloves, unpeeled
4 cod ( skrei ) loins, about 150g/5½oz each, skin on, patted dry
40g/1½oz unsalted butter
2 tbsp olive oil

Method

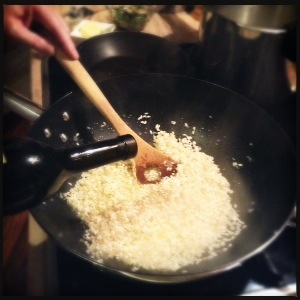
1. For the purée, put the butter beans in a saucepan, cover with cold water and bring to the boil over a high heat, skimming off any foam the rises to the surface. Add the carrot, shallot and garlic, turn the heat down to a simmer, partially cover and cook for 40 minutes until tender.
Strain the beans, reserving 4 tablespoons of the cooking liquid. Discard the carrot, shallot and garlic. Put the beans in a blender with 3 tablespoons of the cooking liquid and blend to a smooth purée. Add the extra virgin olive oil and blend again. Add the remaining cooking liquid if the purée is too thick. Season with salt and pepper, then stir in the parsley, half the lime zest and all of the lime juice.image
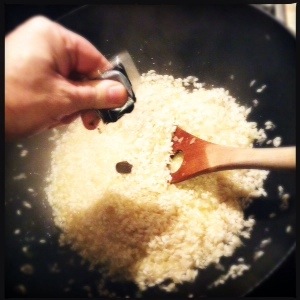
2. For the garlic crisps, heat a deep, heavy-bottomed saucepan with enough sunflower oil to deep-fry the garlic. Heat to 160C/315F, or until a cube of bread browns in 45 seconds. Alternatively, use a deep-fat fryer. (CAUTION: hot oil can be dangerous. Do not leave unattended.)image

image
Meanwhile bring the milk to a gentle boil in a small saucepan, add the sliced garlic and blanch for 2-3 minutes until softened slightly but not breaking up. Remove and pat dry with kitchen paper. Discard the milk.
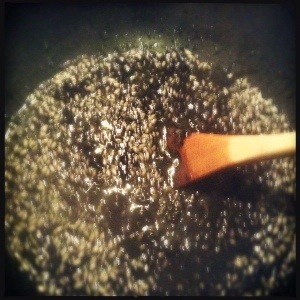
Lightly dust the garlic in the flour, then carefully drop a few slices at a time into the hot oil and fry for 2-3 minutes until golden-brown and crisp. Drain on kitchen paper. Season with salt and set aside.
3. For the cod, blanch the garlic cloves in a small saucepan of boiling water for 4-8 minutes until softened, then drain. Refresh in cold water and pat dry with kitchen paper.image
Season the skin of the cod with salt and pepper. Heat a lidded non-stick frying pan over a high heat. Add the butter and olive oil. When the butter is foaming, add the cod, skin side down, and cook for 3-5 minutes, or until the skin is crisp and golden. imageTurn the heat down to medium-low, add the blanched garlic cloves, partially cover with the lid and cook for 3-4 minutes. Remove the lid, turn the fish over and cook for a further 2-3 minutes until just cooked through.
Serve the cod on a bed of the bean purée with the buttery garlic sauce spooned over the top. Sprinkle with garlic crisps and the remaining lime zest before serving.image
For more info call or mail inquires to: 0031 (0)642297107
simon.bingham@simons-sauces.comimage

French Onion Soup ” soupe à l’oignon. “

13 Feb

French Onion Soup ” soupe à l’oignon. “image
There are few things more comforting than making a real French onion soup – slowly cooked, caramelised onions that turn mellow and sweet in a broth laced with white wine. The whole thing is finished off with crunchy baked croutons of crusty bread topped with melted, toasted cheese. If ever there was a winter stomach warmer, this is surely it!

Legend has it that the first French Onion Soup was created by King Louis the XV of France when all that could be found in the pantry of his hunting party’s lodge was butter, onions and champagne. It is said that he combined these ingredients to create the first French Onion Soup. It is unclear if this story is myth of fact, but it is a good story none the less!

Onions have been a popular staple in preparing meals from at least as far back as the Roman Times. Onions are easily grown in most soils they are cheap abundantly available and have a long shelf-life. For this reason onions were seen as The Poor Mans food.

The modern version of the soup has evolved from a basic recipe where onions were sliced, fried and then cooked in water and would typically be served with bread and capers. It was only in the nineteenth century that cooks started adding flour, salt and pepper and topped the soup with cheeses such as Gruyere.

Today French Onion Soup Recipes is often made with caramelized onion in a meaty broth. This is often served in individual ramekins and topped with grilled Gruyere cheese

Ingredients

50g butter
1 tbsp olive oil
1.5kg onions, halved and thinly sliced
1 tsp sugar
6 garlic cloves, thinly sliced
2 tbsp plain flour
250ml dry white wine
2 litres organic beef, vegetable or chicken stock, hot
140g Gruyère, finely grated
1 good handful fresh sage leaves
Salt and pepper to season

For the croutons
French bread or baguette cut into diagonal slices
1 tbsp olive oil
2 garlic cloves crushed

Method

1.First make the croutons – begin by drizzling the olive oil on to a large, solid baking-sheet, add the crushed garlic and then, using your hands, spread the oil and garlic all over the baking sheet. Now place the bread slices on top of the oil, then turn over each one so that both sides have been lightly coated with the oil.image
Bake them in the oven for 20-25 minutes till crispy and crunchy
2. Put the butter, 2 lugs of olive oil, the sage and garlic into a thick-bottomed, non-stick pan. Stir everything round and add the onions. Season with salt and pepper. Place a lid on the pan, leaving it slightly ajar, and cook slowly for 50 minutes, without colouring the vegetables too much. Remove the lid for the last 20 minutes – your onions will become soft and golden. Stir occasionally so that nothing catches on the bottom. Having the patience to cook the onions slowly, slowly, gives you an incredible sweetness, so don’t be tempted to speed this bit up.
3. Now Add in the flour and stir well. Increase the heat and keep stirring as you gradually add the wine, followed by the hot stock. Cover and simmer for 15-20 mins.
4. To serve, Preheat the oven or grill to maximum. Correct the seasoning of the soup. When it’s perfect, ladle it into individual heatproof serving bowls and place them on a baking tray Put a slice or two of crunchy croutons on top of the bowls of soup, and pile on the cheese. Grill until melted and bubbling. image
For more info mail or call; 0031(0)642297107 simon.bingham@simons-sauces.comimage

Pollo alla Cacciatora servito con erbe e parmigiano polenta, hunters chicken served with a herb and parmesan polenta

18 Jan

Pollo alla Cacciatora servito con erbe e parmigiano polenta, hunters chicken served with a herb and parmesan polenta
image
Pollo alla Cacciatori (Hunter’s Chicken) is found across Northern Italy, with many variations. My version uses meaty bone-in chicken thighs, drumsticks and is full of onions, olives, garlic and tomatoes.
Ingredients
Serves 4

4 x free range chicken thighs and 4 x drumsticks skin on
sea salt
freshly ground black pepper
8 bay leaves
2 sprigs fresh rosemary
1 large onion
6 cloves garlic, peeled (3crushed, 3sliced)
500 ml red wine
flour, for dustingimage
extra virgin olive oil
6 anchovy fillets
1 tbsp capers
I handful of chopped flat leaf parsley
1 handful green or black olives, stoned
1 x 400 g good-quality tinned plum tomatoes.

Method

1. Season the chicken pieces with salt and freshly ground black pepper and put them into a bowl. Add the bay leaves and rosemary sprigs and the crushed cloves of garlic and cover with the wine. Leave to marinate for at least an hour, but preferably overnight in the fridge.

2. Preheat your oven to 180ºC/350ºF/gas 4. Drain the chicken, reserving the marinade, and pat dry with kitchen paper.
3. Dust the chicken pieces with flour and shake off any excess. Heat an ovenproof pan, add a splash of olive oil, fry the chicken pieces until browned lightly all over and put to one side.

4. Place the pan back on the heat and add the sliced garlic and onions. Fry gently until golden brown, then add the anchovies, olives, capers, tomatoes (broken up with a wooden spoon) and the chicken pieces with their reserved marinade. Bring to the boil, cover with a lid and bake in the preheated oven for 1½ hours.

When cooked taste and add the chopped parsley and little salt and pepper if necessary, and serve with a salad, pasta, some cannellini beans or as I do with creamy herb and parmesan polenta , garnish with chopped parsley

Polenta image
An Italian storecupboard staple, polenta has its roots in the peasant cuisine of northern Italy. Where once it was just a humble peasant food, polenta has emerged as a versatile, fine-dining-style. It’s made by grinding corn into flour, or meal. It has a rich yellow, yolk-like colour, and has a slightly sweet flavourPolenta can be cooked to be creamy and thick, or allowed to set and then sliced. Serve it instead of pasta, rice or potatoes. Use in place of breadcrumbs to coat chicken or fish when frying.

Ingredients

Serves 4
150ml milk
½ tsp salt
150g coarse cornmeal
50g butter
25g grated parmesan (optional)
1tsp chopped flat leaf parsleyimage

1. Put the milk in a large, heavy-based pan along with 600ml water and the salt, and bring to the boil. Meanwhile, measure out the cornmeal and put it near the hob.

2. When the pan comes to the boil, add the cornmeal, letting it run in thin streams through your fingers, whisking continuously. Stir for a minute or two until it thickens.

3. Turn the heat right down and stir well, roughly every 4-5 minutes to prevent it sticking, for about 35-45 minutes, until the polenta begins to come away from the sides of the pan. Stir in the butter, parsley and cheese, if using, then put on a hot serving dish.
image
For more info don’t hesitate to mail or call
: simon.bingham@simons-sauces.com 0031 (0)642297107
image

Coconut mackerel curry with lemon rice

28 Dec

Coconut mackerel curry with lemon rice
This delicious curry from Chennai, packed of flavours that are then tamed by the coconut. Mackerel is very popular southern India and is used regularly in coconut curries with tamarind to balance the flavours. Cut it into steaks as these keep the fish together and the bones add flavour to the gravy. Serve with lemon rice – nothing else is needed.
Mackererel curry

INGREDIENTSimage

2 medium onions, peeled and roughly chopped
2 medium tomatoes, roughly chopped
15g garlic, peeled and roughly chopped
8g fresh ginger, peeled and roughly chopped
1 teaspoon turmeric
3/4-1 1/2 teaspoons red chilli powder
1 tablespoon coriander powderimage
350ml water
450-500g whole mackerel, cleaned and cut into steaks 2.5cm thick
3-5 green chillies, left whole
1 1/2 teaspoons tamarind paste, or to taste
250ml coconut milk
salt, to tasteimage
METHOD

Heat the oil in a large non-stick saucepan. Add the fenugreek, cumin seeds and 10 of the curry leaves and fry for 10 seconds. Add the onions and cook for about 6–8 minutes until golden.
Meanwhile, puree together the tomatoes, garlic and ginger and powdered spices. Add to the pan and cook for 8–10 minutes over a high heat or until you can see little droplets of oil on the sides of the masala. Add a splash of water at any point, if necessary.
Add the water, bring to a boil and then add the fish, green chillies and remaining curry leaves. Bring back to the boil and cook for 3–4 minutes. Stir in most of the tamarind paste but leave a little to add later. Once the fish is cooked, add the coconut milk. Stir well, taste and adjust the seasoning and sourness (adding the remainder of the tamarind paste if necessary) and add more water if you prefer a thinner curryimage
Lemon rice

This South Indian dish goes well with seafood and vegetables. Curry leaves are used frequently in this part of India. When you find a fresh bunch, put them to dry on a towel on top of the boiler, then place them in an airtight jar to use as needed.<img src="https://simons-sauces.com/wp-content/uploads/2014/12/image2.jpg?w=300" alt="image
Ingredients
image

2½ tbsp vegetable oil
½ tsp mustard seeds
pinch fenugreek seeds
1 tsp split chana dal (also called Bengal gram lentils)
1 tsp split black gram (also called urad dal or black lentil)
2-3 dried red chillies, left whole
1 rounded tsp chopped fresh ginger
¼ tsp ground turmeric
4 tbsp roasted peanuts
10 curry leaves, torn in half
salt, to taste
3 tbsp lemon juice, or to taste
350g/12oz freshly cooked basmati rice

Preparation method
Heat the oil in a large non-stick frying pan and add the mustard and fenugreek seeds, the chana dal, black gram and the chillies and stir fry until lightly browned.
Add the ginger, ground turmeric, peanuts, curry leaves and salt, to taste, and cook for about 40 seconds.
Stir in the lemon juice and cook for another minute before adding the rice. Stir fry to heat through, being careful not to break up the grains too much.
To serve, place the rice onto serving plates. imageimage
For more info don’t hesitate to contact me; simon.bingham@simons-sauces.com

The Artichoke and my “tagliatelle with artichoke and black summer truffles”

21 Jul

20140721-152414-55454912.jpg
Artichoke facts.
Technically, an artichoke is a flower. In full growth, an artichoke plant can spread nine feet in diameter and stand five feet tall, and one plant can produce over 20 artichokes a year.

Artichokes are a significant source of vitamin C, folic acid and magnesium. Virtually fat-free, the artichoke weighs in at 25 calories (per medium artichoke) and is low in sodium.

Artichokes are one of the oldest foods known to humans

The artichoke is a perennial thistle that originated in the Mediterranean.

The artichoke is technically a flower bud that has not yet bloomed.20140721-152616-55576405.jpg
The first mention of artichokes in literature was around 40-70 AD in The Greek Herbal of Dioscorides, a book on the medicinal uses of plants.

The Greeks and Romans considered them to be an aphrodisiac.

Until the 16th century, women were prohibited from eating them in many countries because they were still considered to have aphrodisiac properties.

King Henry II’s wife, Catherine de Medici, introduced the artichoke to France in the 16th century . She said, “If one of us had eaten artichokes, we would have been pointed out on the street. Today young women are more forward than pages at the court.”

Artichokes were introduced to England by the Dutch in the 1500s.

They were brought to the United States in the 19th century by French and Spanish immigrants.

The top artichoke producers today are Spain, France, and Italy.

California produces 100% of the United States artichoke crop, with Castroville, California calling itself the “Artichoke Center of the World.”

In 1947 Marilyn Monroe, then still going by her given name Norma Jean, was crowned Castroville’s first Artichoke Queen.

Artichoke preparation.

1. Fill a bowl with cold water, then squeeze in the juice of a lemon and add some lemon slices. Have a halved lemon to hand to rub over the cut edges of the artichoke as you prepare it. The lemon juice will prevent the artichoke from oxidising and turning brown.

2. Pull off the tough, dark green outer leaves of the artichoke. Continue until you’re left with the light tender leaves in the centre, then rub all over with the halved lemon.

20140721-153025-55825999.jpg

20140721-153025-55825418.jpg
3. Slice off the top 2cm of the remaining artichoke leaves. Trim the stalk, leaving about 2.5cm, and rub the cut surface with the lemon.

4. Use a small knife to trim the remaining dark green skin from around the base of the artichoke and the top of the stalk, rubbing with lemon as you go. Trim to give a neat shape and flat bottom.

20140721-153238-55958622.jpg
5. Halve the artichoke lengthways to expose the fibrous choke in the centre. Rub with lemon juice, then use a teaspoon (or a grapefruit spoon if you have one) to scoop out the choke from each half. Pull out the tough, spiky red leaves from the centre and rub again with lemon. Put the prepared artichoke hearts in the bowl of lemony water until you are ready to cook them.

20140721-153356-56036427.jpg

Tagliatelle with artichoke and black summer truffles. Tagliatelle con carciofi e tartufo nero estivo

Ingredients
Serves 2

20140721-153904-56344740.jpg
2 globe artichokes prepared and sliced ( see my tip for perpetration )
2 tbsp olive oil
I medium onion or banana shallot
1 garlic clove, finely sliced
1 tbsp chopped parsley
2 tbsp double cream
salt and pepper
250g tagliatelle pasta fresh or dried it’s up to you
75g parmesan half grated and the rest as shavings ( a potato peeler is fantastic for this )
25g toasted pine-nuts
50g/1¾oz fresh black truffle

20140721-154024-56424845.jpg
Slice the prepared artichokes in half and cut into fine slices.
Heat the olive oil in a frying pan and gently cook the artichoke onion and garlic for two minutes.

Add four tablespoons of water, cover with a lid and cook for four minutes, or until the artichokes are tender.

When the artichokes are cooked, add the parsley and cream and season with salt and pepper.

20140721-154517-56717787.jpg
Meanwhile In a pan of boiling salted water, cook the tagliatelle until al dente. Using a pair of tongs, transfer the tagliarini to the frying pan containing the artichokes.

Add a couple of tablespoons of pasta water and half of the grated parmesan to the frying pan. Toss well and grate a little truffle into the pasta.

Check the seasoning and add salt and pepper as required. Toss again so the truffle is absorbed into the sauce.
Serve in hot bowls with more truffle slices, toasted pine-nuts and the remaining parmesan shavings on top.

20140721-155129-57089097.jpg

For more info don’t hesitate to mail or call
: simon.bingham@simons-sauces.com 0031 (0)642297107

20140721-155545-57345106.jpg

Lamb shank tagine with herb tabbouleh

22 Apr

Tagine is the Moroccan word that refers to both the unique glazed earthenware vessel with a distinctive conical lid and also the food prepared in it.

20140422-161520.jpg

Traditionally used by nomads throughout Northern Africa Tagines are primarily used to slow-cook savory stews and vegetable dishes over charcoal braziers . Because the domed or cone-shaped lid of the tagine traps steam and returns the condensed liquid to the pot, a minimal amount of water is needed to cook meats and vegetables to buttery-tenderness. This method of cooking is very practical in areas where water supplies are limited

20140422-161619.jpg
Harissa paste
This is a fiery North African paste that is orangey-red in colour. It’s a mixture of peppers, dried red chillies, garlic, caraway seeds, ground cumin and coriander, tomato purée, salt and olive oil. It can be used as a condiment or as an ingredient in cooking and provides a real boost as an accompaniment to vegetables and pulses.

20140422-161725.jpg
Ras el Hanout
Ras el hanout, which translates literally as “head of the shop”, originated in the Meghribi villages of North Africa. It is a complex and distinctive mix of about 20 to 27 spices and herbs, the quantities of which vary according to the maker. Specific quantities are a much guarded secret from one spice shop to the next, and blending is considered an art. Ras el hanout is used with poultry, meat, game, rice and couscous. It can be found already mixed, like in specialty stores

20140422-161947.jpg

My Lamb shank tagine with herb tabbouleh

This slow-cooked lamb stew with Moorish ingredients: ras-el-hanout, harissa paste, saffron, olives, dried apricots, pomegranates, pistachios and plenty of herbs provide the exotic flavours.Ingredients:
30 mins to 1 hour preparation time
Over 2 hours cooking time
Serves 4

For the lamb tagine:
4 lamb shanks
3 tbsp olive oil
1 onion, thickly sliced
2 garlic cloves, peeled, finely chopped
1 tsp ras-el-hanout
2 tbsp harissa paste
2 cinnamon sticks
½ tsp ground ginger
½ tsp smoked sweet paprika
1 tsp ground cumin
¼ tsp freshly ground black pepper
½ tsp ground turmeric
1 x 400g/14oz tin chopped tomatoes
1 tbsp clear honey
½ tsp saffron
350ml/12fl oz chicken stock
125g/4½oz stoneless dried apricots, halved
110g/3¾oz green olives, stones removed
100g/3½oz flaked almonds, leave a few for garnish
salt and freshly ground black pepper

For the tabbouleh:
175g/6oz bulgur wheat , I like to use the corse type
350ml/12fl oz chicken stock
1 small red onion, finely chopped
350g/12oz pistachio nuts, shells removed, roughly chopped
1 lemon, juice and zest
1 pomegranate, seeds only
3 tbsp extra virgin olive oil
3 tbsp chopped fresh flat leaf parsley
3 tbsp chopped fresh coriander leaves
3 tbsp chopped fresh mint
3 tbsp chopped fresh tarragon
To serve
2 tbsp coriander cress

1. For the lamb shank tagine , preheat the oven to 160C/325F/Gas 3.

2. Heat a large tagine pan or a large ovenproof dish. Season the lamb shanks all over with salt and pepper. Pour in the olive oil and, once hot, fry the lamb shanks all over until golden-brown. Remove them from the pan and set aside.

20140422-162730.jpg

20140422-162739.jpg
3. In the same pan you used to fry the shanks, add the onion and garlic and fry for 2-3 minutes.
Add the ras-el-hanout, harissa, cinnamon sticks, ground ginger, smoked sweet paprika, ground cumin, freshly ground black pepper and ground turmeric and cook for a further two minutes

20140422-162937.jpg

20140422-162950.jpg

<

4. Add the lamb shanks back to the pan and stir well, then add all of the remaining tagine ingredients – except a few of the flaked almonds for garnish.

5. Reduce the heat, cover the pan with a lid and cook in the oven for two hours, or until the lamb is tender.

6. Remove the lid and cook for a further 30 minutes, or until the tagine is slightly thickened.

20140422-164723.jpg

20140422-164731.jpg

20140422-164740.jpg
7. For the tabbouleh, place the bulgur wheat into a pan with the chicken stock. Bring to the boil, then reduce the heat to a simmer. Cover the pan with a lid and cook for 15-20 minutes over a low heat. When the bulgur wheat is tender, drain off the excess stock.

8. Remove from the heat and allow to cool slightly, and then transfer the bulgur wheat to a bowl. Add the red onion, pistachios, lemon juice and zest, pomegranate, olive oil and herbs and mix well. Season, to taste, with salt and freshly ground black pepper.

20140422-164859.jpg

20140422-164905.jpg

20140422-164914.jpg

20140422-164921.jpg
9. To serve, divide the tabbouleh among four serving plates, and then spoon the lamb shank tagine alongside. Chop the coriander cress and sprinkle over the tagine along with the flaked almonds.

20140422-165250.jpg

For more info don’t hesitate to mail or call
simon.bingham@simons-sauces.com 0031(0)642297107

20140422-165458.jpg

20140422-165507.jpg

Octopus and my warm braised octopus salad

27 Mar

Octopus and my warm braised octopus salad20140327-150735.jpgWhat is an Octopus?

Octopuses are cephalopods similar to squid (also called calamari) and
are considered seafood with some of the properties of fish, but with
an entirely different taste and texture. The most commonly eaten part
is the arms, and sometimes the mantle (head area). Small octopuses are
eaten whole. Octopus is a common ingredient in sushi, as well as fish
soups and pastas, and is occasionally eaten live, as well as fried,
boiled, baked, grilled and so forth. Older, larger octopuses can be
tough if they are not prepared properly.
20140327-150840.jpgThe Health Benefits of Octopuses

Octopus is a low calorie, lean seafood, making it a good way to get
protein in your diet without adding too much fat. There are
approximately 140 calories per 3 oz. (85g) of octopus, with only 1.8g
of fat. Octopus is a very good source of iron, which is a common
deficiency leading to weakness, fatigue and anemia.

Octopus is also a source of calcium, potassium, phosphorus and
selenium. It provides several important vitamins including vitamin C,
vitamin A and several B vitamins, as well as some omega-3 fatty acids.
Omega-3 is an important nutrient, which may decrease the chances of
heart disease, as well as cancer and depression. It also seems to
boost the immune system and aid in brain development in children.Afbeeldingjjjj 039Octopus also contains taurine, which is an organic acid that acts as
an antioxidant, and may protect against some of the stressful effects
of exercise. Taurine is also suspected to help prevent heart disease,
some studies have also linked it with improved blood sugar levels.

My warm braised octopus salad recipe

Ingrediënts
Serves 4Afbeeldingjjjj 013
Octopus salad
1 onion
2 carrots
6 tomatoes
4 garlic cloves
1 knob of butter
100 ml of white wine
500 ml of Fish stock
1 kg fresh octopus
freshly ground black pepperAfbeeldingjjjj 002Vinaigrette
2 shallots
75 ml of red wine vinegar
150 ml of extra virgin olive oil
1 tbsp English mustardAfbeeldingjjjj 003To plate
purple sprouting broccoli spears
1 kg new potatoes cooked
20 g of capers
4 sprigs of fresh tarragon
1/2 lemon
Sea Salt

Method
1.
To make this octopus recipe, begin by chopping the onion and carrots,
quarter the tomatoes and crush the garlic.
2.
Melt the butter in a large saucepan over a medium heat, stir in the
vegetables and fry gently, without colouring, for about 5 minutes or
until softened.
3.
Pour in the wine. Increase the heat to high and boil until the wine
has reduced to about a teaspoon of liquid, then pour in the fish
stock. Bring to a simmer.Afbeeldingjjjj 011
Afbeeldingjjjj 012
Afbeeldingjjjj 016
4.
Clean the octopus, and remove tentacles from the prepared body (your
fishmonger can do this for you).
5.
Once the pan is simmering, add the octopus. Reduce the heat to low and
simmer for 1 1/2 hours, or until the octopus is tender.
Afbeeldingjjjj 007
Afbeeldingjjjj 008
Afbeeldingjjjj 018
6.
Strain the contents of the pan through a sieve into a bowl and leave
the collected cooking liquor and octopus to cool.
7.
When the octopus is cool enough to handle, slice across the body into
2 cm-thick strips and set aside.
Afbeeldingjjjj 025
8.
To make the vinaigrette, finely chop the shallots and place in a bowl
with the vinegar.
9.
Measure out 75 ml of the reserved cooking liquor, add to the bowl and
leave to stand for 30 minutes.
10.
into the shallot mixture
whisk in the olive oil. Season with salt.
11.
Pour about half the vinaigrette into a small saucepan and warm very
gently over a low heat – do not let it boil. Add the sliced octopus and heat through for 2/3 mins
Afbeeldingjjjj 019
Afbeeldingjjjj 027

12.
Meanwhile, bring a large saucepan of salted water.
13.
Add the purple sprouting broccoli and simmer for a further 2 minutes,
until just tender. Drain and place in a large bowl.
14.
Chop the tarragon and add to the broccoli, cooked potatoes and capers.
15.
Gently stir in the warm vinaigrette and octopus.
16.
Add lemon juice to taste and season with sea salt and black pepper
Afbeeldingjjjj 034
Afbeeldingjjjj 032
Afbeeldingjjjj 031
17.
Spoon the octopus salad onto serving plates and serve with the
remaining vinaigrette in a jug on the side
Afbeeldingjjjj 037

For more info dont hesitate to mail or call
simon.bingham@simons-sauces.com 0031(0)642297107
Afbeeldingjjjj 036

Biscotti or Cantuccini

8 Mar

20140308-114048.jpg
Biscotti also known as Cantuccini are oblong, thick, brittle cookies designed to be dipped in coffee, cocoa, or dessert wine.
Originating in the Italian city of Prato the term “biscotti” comes from the Latin for “twice baked” because the cookies must be baked twice to make them dry and crunchy. Although these cookies were traditionally almond flavored, modern versions come in a wide variety of flavors. In Italy, these cookies are called “cantucci” or “cantuccini”, while the term “biscotti” is used to refer to many different types of crunchy cookies.

The first biscotti were made as a portable and durable food for Roman soldiers and travelers. They started to be made with the traditional almond flavor during the Renaissance, when it also became popular to dip them in a traditional Italian dessert wine called Vin Santo, a practice that remains common in Italy today. Many people outside of Italy prefer to dip biscotti in coffee or hot chocolate to soften them before eating them. The range of flavors that these cookies come in has also expanded hugely since their creation, and includes ingredients as diverse as walnuts, carob chips, orange zest, and anise. Some types are coated with icing or glazed with chocolate, but the most traditional ones do not have a frosting or coating.

Cranberry & Nut Biscotti
Makes 18-20

20140308-114230.jpg140g plain flour
85g light muscovado sugar
1 large egg
1/2 tsp baking powder
1 tsp ground allspice
55g dried cranberries
55g mixed nuts, toasted
butter or oil for greasing
Zest of 1 orange

Method
1. Preheat the oven to 180C/160C fan/350F/Gas Mark 4, and grease a baking sheet.

2. Whisk the sugar and the egg until it’s pale and thickened a little.

3. Sift the flour, baking powder and allspice into a separate bowl, then fold into the mixture.

4. Add the cranberries, orange zest and pine nuts and mix gently.

20140308-114755.jpg

20140308-114806.jpg

20140308-114838.jpg

20140308-114909.jpg5. Turn the dough out onto a lightly floured surface, and shape into a long roll, about 28cm/11in long.

6. Transfer the roll onto the baking sheet, press to flatten slightly, and pop in the oven for 20-25 minutes, until golden.

20140308-115140.jpg

20140308-115147.jpg

20140308-115153.jpg7. Cool for a few minutes, then cut into 1.5cm thick slices, and lay the slices sideways on the baking sheet. Put back in the oven for another 10 minutes, or until golden. Cool on a wire rack.

20140308-115323.jpg

20140308-115345.jpg

20140308-115355.jpg

20140308-115407.jpgFor more info don’t hesitate to mail or call :
simon.bingham@simons-sauces.com
0031 (0) 642297107

20140308-115534.jpg

Beetroot and my Beetroot risotto, Barbabietole risotto

31 Oct

20131031-194832.jpg

What is a beetroot?

20131031-194926.jpg
Also known as the garden beet, the beetroot is a sweet, maroon coloured root vegetable. It is a healthy, low-calorie food filled with fiber. It is known to help improve health conditions such as high blood pressure. The leaves of the red beet can also be eaten.

Beetroot can be consumed in a variety of ways. If consumed raw, beets should first be peeled. The top and bottom of the root should also be removed prior to ingesting. Beets can also be boiled, sautéed, pickled, fried, juiced, steamed, pureed, grilled, or baked. When cooking beets, the skin may be left on until it is loose enough to fall off, retaining the vegetable’s vivid color.

Soups made from beets, such as cold borsch, are popular in Europe. Pickled beets are a typical way of serving the plant; these are often served on hamburgers in Australia and New Zealand. Juices from the pickled vegetables are often used to prepare other dishes, such as hardboiled eggs, as well. Another common way of serving the vegetable is as a side dish or salad component.

20131031-195026.jpg
Canned beets are generally considered to have an inferior taste to fresh beets. Beetroot can be grown at home by planting seeds following the last frost of the spring. The plants require sparse, weekly watering during the majority of the season, with daily moisture provided on hot days.

Caution should be used when preparing beetroot. The colorful pigmentation of the vegetable can stain clothing. If consumed in large quantities, the vegetable can also cause discoloration, typically in a shade of pink, of the urine. This light sensitive vegetable will also turn colors when cut and exposed to light.

Ten beetroot facts

1. The beetroot we eat now is Beta vulgaris, which evolved as a cultivated version of the sea beet, Beta maritima.

2. The ancient Greeks offered beetroot to the god Apollo on silver platters at his temple at Delphi.

3. The 17th century herbalist Nicholas Culpeper said that beetroot juice is good for headaches and afflictions of the brain.

4. Martin Chuzzlewit is the only novel by Charles Dickens that mentions beetroot.

5. The sugar beet has been the official state historic vegetable of Utah since 2002.

20131031-195217.jpg
6. The ancient Romans considered beetroot to be an aphrodisiac.

7. The Lupanare, the official brothel of Pompeii, had its walls decorated with pictures of beetroots.

8. One of Alan Sugar’s (the English entrepreneur )first jobs at the age of 11 involved boiling beetroot for a local greengrocer.

9. When American astronauts on Apollo 18 docked with Russians on Soyuz 19 in 1975, the Russians offered them traditional foods including beetroot and cabbage soup.

10. The world’s biggest beetroot was grown in 2005 by Dutchman Piet de Goede weighing 156lb 10oz.

Beetroot risotto, Barbabietole risotto

Ingredients
Serves 4

20131031-195532.jpg

1.5 litres good quality vegetable or chicken stock, preferably homemade
1tbsp olive oil
4 shallots or 1 onion, finely chopped
3 garlic cloves, finely chopped
350g (12oz) fresh beetroot, peeled and diced. ( while peeling and chopping wear latex gloves, otherwise you lend up with red fingers )

20131031-195845.jpg

20131031-195857.jpg

20131031-195920.jpg

20131031-195935.jpg
250g (8oz) risotto rice
100ml (3½fl oz) white wine
50g (2oz) butter
100g (3½oz) Parmesan cheese
2 bay leaves
2 tbs fresh thyme leaves chopped

Method

1, Heat the stock in a saucepan until almost boiling, then reduce heat until barely simmering to keep it hot.

2, Heat the oil in a shallow heavy-based pan. Sauté the shallot, garlic, bay leaves, beetroot and half of the thyme until softened (about 6-8 minutes).

3, Add the rice and stir well until the grains are well coated and glistening.

4, Pour in the wine, stir and let the rice absorb everything

20131031-200245.jpg

20131031-200348.jpg

20131031-200403.jpg

5, add one ladleful of hot stock let it simmer, stirring all the time until it has been absorbed.

6, Continue to add the stock at intervals and cook as before until the rice is tender but firm.

7, Add the butter and most of the cheese and stir gently.

20131031-200540.jpg

20131031-200606.jpg

8, Serve scattered with the remaining thyme, the remaining cheese, a good grinding of black pepper and a touch of salt but not too much as the Parmesan gives salt too

20131031-200840.jpg
Boun appetito 😊🍴

For more info , questions or queries mail or call:
simon.bingham@simons-sauces.com. 0031 (0) 642297107

And of course I can come and cook it for you🔪🍴

20131031-201244.jpg

Squid Ink Risotto / Risotto al Nero di Seppia

28 Oct

Black risotto or risotto al nero di seppia made using cuttlefish or squid ink is a dramatic looking dish originating from Venice.
In my recipe I use homemade fish stock, it is worth the time to make your own stock as It gives a fresher more intense flavour, but stock cubes can be used.

Fish Stock

Ingredients
1kg fish bones and skin, preferably bones from white fish , try to avoid oily fish such as salmon or mackerel as it can become bitter.
1 carrot, peeled and roughly chopped
1 onion, peeled and quartered
1 leek, roughly chopped
1 stalk celery, roughly chopped
½ bulb fennel, roughly chopped
6 black peppercorns
2 bay leaves
3 fresh parsley stalks
I glass of white wine
Splash of olive oil

Preparation method

1. Put all the vegetables into a large pan add the oil, peppercorns, bay leaves and parsley, gently heat to soften but not colour.

2. Remove Gil’s from the fish heads and rinse under cold water to remove any blood stains.

3. Once vegetables have softened pour in the wine and turn the heat up to cook off the alcohol.

4. Add fish bones and 2 litres of water bring to the boil and skim off any scum that has formed.

5. Reduce the heat cover and simmer very gently for 20-30 minutes. Strain into a large bowl and allow to cool or use directly in your risotto
Any leftover stock can be frozen and kept for 3 months.

20131028-105917.jpg

Squid Ink Risotto / Risotto al Nero di Seppia

Ingredients

20131028-110212.jpg

1.5 litre fish stock
50g/2oz butter
1 onion or banana shallots finely chopped

20131028-112156.jpg
½ tsp dried red chilli flakes
250g/9oz arborio rice ( risotto rice)
125ml/4½fl oz dry white wine
2 sachets squid ink (available from some fishmongers)
500g squid
salt and freshly ground black pepper
1 lemon, zest only
2 tbsp flatleaf parsley
½ tsp dried red chilli flakes
extra virgin olive oil

20131028-112330.jpg

Preparation method

1. For the risotto, place the chicken stock into a pan and bring to a gentle simmer.

2. Meanwhile, heat another pan until hot and add a splash of olive oil and the butter. Once the butter has melted, add the onion, half of the garlic and chilli flakes. Cook for a few minutes until softened, but not coloured.

3. Add the rice to the pan and stir with a wooden spoon until the rice is translucent and coated with the oil.

4. Add the wine and cook until the liquid has reduced by half.

20131028-112552.jpg

5. Add the squid ink and stir thoroughly with a wooden spoon to disperse the ink throughout the rice.

6. Pour in the hot stock, a ladle at a time, and keep stirring until each ladleful is absorbed. Keep adding the stock, stirring as often as possible until the rice is tender, but still with a slight resistance to the bite – this should take about 20-30 minutes.

20131028-112711.jpg

20131028-112747.jpg

7. Meanwhile, clean the squid. Pull the tentacles away from the squid’s body. Remove the quill from inside the body and discard. Clean the body by running it under a tap or cleaning it in a bowl of water. Remove the ‘ears’ from either side of the squid body and remove the skin with your fingers. Cut the tentacles just below the eyes, being sure not to cut the ink sac. Be sure to remove the ‘beak’ at the base of the tentacles. Cut the body of the squid into rings.

20131028-113041.jpg
8. preheat a pan until hot

9. Add splash of olive oil , the rest of the garlic and the squid. Cook on a high heat for 1-2 minutes or until coloured on all sides and just cooked through.

10. Remove the squid from the heat and place into a bowl. Add the lemon zest, parsley, chilli flakes . Mix together and season with a little salt and freshly ground black pepper.

20131028-113329.jpg

20131028-113417.jpg

20131028-113436.jpg
11. To serve, spoon the risotto into the centre of each of individual plate and top with a pile of marinated squid and a drizzle of olive oil

20131028-113622.jpg

For more info don’t hesitate to mail or call
: simon.bingham@simons-sauces.com 0031 (0)642297107

20131028-113758.jpg