Archive | Cooking Skils & Tips RSS feed for this section

Salt Baked Sea-bass with a summer fennel and bean salad

20 Jul

Salt Baked Sea-bass with a summer fennel and bean salad

20130720-211900.jpg
Although the most abundant ingredient in this recipe is salt, this dish is not salty. The purpose of the salt is to encrust the whole fish, cook it evenly and not let it dry out. The result is a very moist fish with clean and pure flavor. My favorite fish to cook using the salt crust method is the SeaBass, but you can use almost any whole fish. Serve this dish with a yummy salad for a simple summer meal. Oh and all the salad ingredients have been organically grown in mr garden😊

Ingredients
Serves 2

20130720-212128.jpg

For the sea bass

1kg Line-caught sea bass, gutted and scaled
1kg fine sea salt
2 free range egg whites
1Fennel bulb Finley sliced tops an fonds saved apart

20130720-212338.jpg

20130720-212352.jpg
3 bay leaves
1 onion Finley sliced
1 lemon
1 bunch of dill , 1/2 Finley chopped

20130720-212427.jpg

20130720-212436.jpg

20130720-212445.jpg
1 handful cherry tomatoes halved
200g freshly podded board beans and peas , blanched and de skinned if you have the time😁

20130720-212607.jpg

20130720-212615.jpg
Method

Preheat an oven to 220C

1. Mix together the 1kg of salt, dill and egg whites until you have a paste of damp salt.

20130720-212708.jpg

20130720-212715.jpg

2. Line a large roasting tray with salt, at least 1.5cm deep

3. place the sliced fennel, onion, lemon and bay leaves on top of the salt base and place the sea bass on top of the salt.fill the cavity of the sea bass with the remaining dill

20130720-212853.jpg

20130720-212900.jpg

20130720-212909.jpg

20130720-212917.jpg
4. Cover the sea bass with the remaining salt, patting it down so that it tightly and thickly covers the entire fish. Moisten the salt a little more if necessary to make it stick.

5. Place the salt covered sea bass into the preheated oven and bake for 30 /40minutes

20130720-213019.jpg

20130720-213034.jpg
6. Meanwhile, make the salad Very finely chop the fennel fronds and place into a mixing bowl. Add the tomatoes, peas, broad beans and chickpeas. Stir in the lemon juice,and olive oil. Add the salad leaves and toss together Taste and season with pepper as necessary.

20130720-2131127..jpg
7. To serve, crack the salt crust open and discard the salt. Peel away the skin of the fish, fillet the flesh, discarding any bones and serve immediately with the salad.

Bon appetite 😊🍴

20130720-213402.jpg

20130720-213409.jpg

20130720-213416.jpg

20130720-213443.jpg

20130720-213525.jpg

20130720-213537.jpg

20130720-213605.jpg

20130720-213616.jpg

20130720-213631.jpg

20130720-213636.jpg

20130720-213641.jpg
For more info don’t hesitate to mail or call :
simon.bingham@simons-sauces.com 0031 (0)642297107

Squid and Choritzo salad

19 Jul

Squid and Choritzo salad

20130719-230558.jpg
Squid a delicious, healthy and inexpensive ingredient used all around the world . Many people are afraid of how to cook and prepare but if you follow my simple guide I’m sure you’ll cook it over and over again .
Squid Is best cooked in two ways , long and slow at a low temperature, or fast on a high heat like in the recipe that follows .
You can of course ask your fishmonger to prepare everything for you, but there’s nothing better or satisfying than doing it your self🍴🔪

Preparing Squid
Cleaning and preparing a squid is easier than you might think.
1. Pull the tentacles away from the body of the squid.

20130719-230846.jpg

20130719-230853.jpg

20130719-230904.jpg
2. -Feel inside the body for the quill (it resembles a shard of plastic). Pull it out of the squid and discard.
-Rinse inside the body of the squid in cold water.

20130719-231057.jpg
3. Pull the ears (wing-like flaps) from the body. Pull the purplish skin from the ears and body to leave only the white meat.

20130719-231216.jpg

4. Cut the tentacles away from the guts by slicing just below the eyes. Check the centre of the tentacles for the hard beak, which can be discarded. (Discard the guts of the squid or, if desired, retain the ink sack to use in seafood pasta or risotto.)
5. Either slice the body of the squid into rings, or cut down one side of it, open it out, scrape away any traces of guts left inside the body, then score the inside lightly in a cross-hatch pattern.
-Dry off the squid before cooking.

20130719-231346.jpg

20130719-231354.jpg
Squid and Choritzo salad Recipe
Ingredients
Serves 4

20130719-231607.jpg
400g dried chickpeas, soaked overnight , or a tin of ready soaked
600g prepared medium-sized squid

20130719-231739.jpg
2 big handfuls of cherry tomatoes halved

20130719-231833.jpg
I lemon
6 tablespoons extra virgin olive oil
1 medium-hot red chilli, seeded and thinly sliced across
3 garlic cloves, finely chopped

20130719-231923.jpg

20130719-231932.jpg

20130719-231940.jpg

20130719-231947.jpg
A small handful of flat-leaf parsley leaves, chopped
200g chorizo picante , cut across into thin slices
100g rocket leaves or watercress
1/2 teaspoon pimenton ( spanish smoked hot paprika powder )
Salt and coarsely ground black pepper

20130719-232059.jpg

20130719-232111.jpg

20130719-232309.jpg
Method
1. Drain the soaked chickpeas, put them into a pan and cover with fresh cold water. Bring to the boil and simmer until the skins begin to crack and they are tender – about 40 minutes – adding 1 teaspoon salt to the pan 5 minutes before the end of the cooking time. Drain and leave to cool.
2. prepare the squid as above
3. Stir the tomatoes into the chickpeas with the lemon juice, 4 tablespoons of the olive and some salt and pepper to taste.

20130719-232532.jpg
4. Heat 2 tablespoons of the remaining olive oil in a large frying pan over a high heat.

20130719-232611.jpg
5. Once at a high temperature ( the oil should start to smoke ) add the squid pieces, scored side facing upwards first (this will make them curl attractively), the chilli, garlic and the tentacles and sear for 30 seconds, then turn them over and sear for another 30 seconds until golden brown and caramelized. Season with salt and pepper

20130719-232700.jpg

20130719-232709.jpg
6. Throw in the chorizo and toss together over a high heat for a further minute. add parsley and pimenton toss all together.

20130719-233029.jpg

20130719-233036.jpg

20130719-233052.jpg

20130719-233100.jpg
7.Briefly toss the rocket leaves through the chickpea salad and spoon onto 1 large or 4 individual plates. Top with the sautéed squid and chorizo and serve.
Bon appetite !!!

20130719-233154.jpg

20130719-233205.jpg
For more info don’t hesitate to mail or call
: simon.bingham@simons-sauces.com 0031 (0)642297107

20130719-233529.jpg

20130719-233535.jpg

20130719-233542.jpg

Knives & Chopping Boards

20 Oct

What Knives Do I Need for Cooking

There are many kitchen knives available on the market; however, a few good kitchen knives can meet the needs of the ordinary kitchen. Purchasing a block of kitchen knives for cooking is often unnecessary and can be a waste of money. Instead, carefully selecting two or three important kitchen knives can make a great impact in the kitchen.

All individually selected kitchen knives should be stored on a magnetic wall strip or in a universal block, Never in a drawer!!! And Never clean in a dishwasher , wash by hand!!!

So, what are the most important knives to know? I’d say you need four: a chefs knife, a santuku knife, a paring knife and a serrated bread knife.


Chef’s knife

Purchase a good quality chef’s knife first. A chef’s knife can do many things such as chop, dice, slice and mince, which is why it is the most important knife in the kitchen. The slightly curved blade allows for easy cutting, and the weight of the knife allows it to slice through thick or tough foods. Choose a chef’s knife that feels good in the hand and is not too lightweight. The knife should be between 15 and 25cm long to be the most versatile. Additionally, the metal should continue through the handle of the knife, which is called a full tang knife.

Santoku Knife

After finding a chef’s knife, search for a santoku knife. A santoku knife is similar to a chef’s knife; however, it has a wider blade and is thinner in thickness. As a result, it can cut smoothly and more precisely through thick or dense vegetables. Additionally, this knife works well to butterfly boneless chicken breasts and slice foods into fine, narrow pieces. Santoku knives are generally easier to use than chef’s knives because they are made to be well-balanced and precise.

Paring Knife

Measuring in at between 5 and 9cn long, paring knives are short blades with a pointy tip. Despite their dinky size, these versatile pieces of cutlery are an integral part of your cooking arsenal. Paring knives are great tools for scoring, peeling, boning and anything else you that requires a small point with maximum control. Navigating small areas is something you’ll do frequently as a home chef, and the paring knife is made with these tasks in mind.

Serrated Bread Knife

Serrated bread knives are great for cutting anything that’s crusty on the outside and delicate on the inside. Think baguettes, bagels, and pineapples: you want something hard core enough to get through the tougher outer part while not obliterating the lovely fleshy bits. Serrated knives also make quick work of tomatoes and citrus, easily slicing through their Teflon-like skin.

                                                           Chopping Boards

One of the easiest things you can do to insure the long life of your kitchen knives is to use the right kind of cutting board. And believe it or not, even in this age of high-tech materials just about the best substance for your knives to cut and cube on is still wood. Plastic is the other most favored material. (Not any plastic and not any wood.) never ever use Glass, granite, porcelain or any other hard surface as this can damage and blunt your blade

Wooden Boards

Traditionally there are two types of wooden chopping boards; End grain and Flat grain. Wood is attractive and will look good in any kitchen. No matter how much you use them, wooden boards tend to mature over time and will look good for many years.

End grain boards are made up of many square or rectangular batons of wood, bonded together under high pressure. The board is then created by slicing across the grain. This technique leads to attractive boards which won’t warp, are durable, and are kind to your knife edge. At a microscopic level, as a blade is drawn across the surface of the board, the individual wood fibres are able to bend out the way, hence are not damaged. Likewise, as the blade is not cutting through wood fibres it will maintain its edge for longer.

Flat grain boards are generally made up of larger sections of wood, with the grain, as the name implies lying flat. Normally a board will be made up of three or four sections of wood and they often have lovely grain structures. The simple construction means that these boards are usually excellent value for money. Though not quite as durable as end grain boards, flat grain boards with normal domestic use will none the less give many years of service.

Wood is intrinsically hygienic; the natural enzymes that protected the tree when it was alive still do their bit to fight bacteria on the surface of the board. Wooden boards should be cleaned with hot water and a little mild detergent if necessary. Avoid using excessive amounts of detergent, as this will dry the wood out. Over time, the natural oils in the wood will be depleted. To maintain the board in tip top condition and maximize its life it should be periodically treated with wood oil, available from this site. Never leave a wooden board to soak in water or put it in the dishwasher!

Plastic Boards

Plastic has similar properties to wood. It’s tough, yet soft enough not to dull a knife blade. It doesn’t heal up quite as well, and it doesn’t look as good after it’s accumulated hundreds and hundreds of score marks. On the other hand, a plastic board will generally cost a fraction of the price of a wooden one, so it won’t cost as much to replace. It will also be thinner and lighter than your average wood board. And, as an additional bonus, you can throw it in the dishwasher if you choose

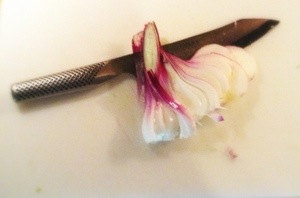
Plastic boards come in different colors which you can use as a coding system. Red for raw meats; green for vegetables; etc., etc.—this is what professional kitchens do to help prevent cross-contamination. Another good thing about plastic boards is that unlike wood, they don’t tend to take on as much the flavors of pungent tasting foods like onion and garlic.

There’s one more important thing to mention regarding wood and plastic cutting boards, namely, how to keep them clean and avoid cross contamination wood tends to retain less bacteria than plastic. But if you designate  a chopping board for raw meat only and stick to, then the difference between the two materials becomes negligible.

So pick the type you like the best, or mix it up as I do. Both wood and plastic boards (as long as they’re the right kind of wood and the right kind of plastic) will help keep your knife edges sharp and look good in your kitchen.

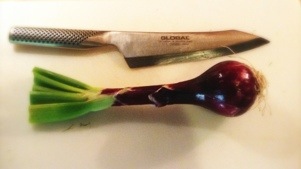
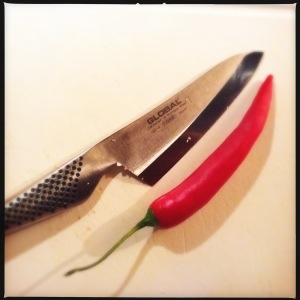
If your looking to buy a new set of knives my preference goes out to Global , but that’s my personal choice , there are many great makes out there so choose wisely.

How to cook perfect pasta

15 Oct

One of the best reasons for eating pasta is that, in 15 minutes from start to finish, you can provide yourself with a complete meal. If you want to enjoy cooking and eating pasta at its best, then my advice is to buy good quality. Yes, it does cost more, but we’re not talking about great luxury here; we’re talking about a main meal for two people that might cost 2 euros instead of 1euro. Poor quality pasta often ends up sticky and soggy. So when you buy your pasta, make sure it says pasta di semola di grano duro – durum wheat semolina pasta. A good pasta has a rough texture this helps the sauce stick to it, while the poor quality has the texture smooth..


salt your water. And I mean really salt your water. None of this “pinch” business. Salt amplifies flavor, so allowing pasta to rehydrate in a briney solution will mean that the noodles themselves are properly seasoned, your pasta water should be as salty as seawater. Before the pasta goes in make sure the water is up to a good fierce boil. Add the pasta as quickly as possible and stir it around just once to separate it. If you’re cooking long pasta like spaghetti, push it against the base of the pan and, as you feel it give, keep pushing until it all collapses down into the water.

You don’t need to put a lid on the pan: if it’s really boiling briskly it will come back to the boil in seconds and, if you put a lid on, it will boil over. Put a timer on and give it 10-12 minutes for top-quality pasta, but because this timing varies according to the shape and quality of the pasta, the only real way to tell is to taste it. So do this after 8 minutes, then 9, and 10, and so on. This only applies when you cook a particular brand for the first time. After that you will always know how long it takes. Sometimes you can give it 1 minute’s less boiling and then allow an extra minute’s cooking while you combine it with the sauce.

Have a colander ready in the sink then, as you are draining the water, swirl it around the colander, which will heat it ready for the hot pasta. Don’t drain it too thoroughly: it’s good to have a few drops of moisture still clinging as this prevents the pasta from becoming dry. Place the colander containing the pasta back over the saucepan to catch any drips.

There’s nothing worse than sauce that slips off your spaghetti and ends up in a pile at the bottom of the bowl. How to prevent this? Add 1/ tbl spoons of pasta water to your sauce along with the noodles. The starch that leeches into the water while pasta cooks does a great job of helping a sauce cling to the noodles’ surface.

Finish with fat. Adding a splash of oil, and a handful of shaved cheese into your sauce right before serving, it will help even further bind noodles to their sauce. The fat infusion also amps up flavor, and lends your sauce that luxurious velvety texture that you typically only get at your better Italian restaurants.

For info and help dont hesitate to mail or call;

simon.bingham@simons-sauces.com 0642297107

%d bloggers like this: